
Most climbing gyms have a pad covering the entire floor of the bouldering area these days. When you go bouldering for the first time outside, it will be evident that this is not the case. Crash pads when used correctly can help keep you safe when bouldering outdoors.
Below are 11 tips that will help you use these crash pads correctly and prevent you from getting injured.
- Make sure the pad is the right side up
- Position the pad to cover the fall zone
- Make a level landing area
- Lay out multiple pads to cover more area
- Stack pads for higher problems
- Make sure the most dangerous part is well covered
- Move pads when needed
- Do not drag the pad when possible
- Remove pad accessories when necessary
- Fall feet first onto the pad
- Have a good spotter.
Although some of these tips seem obvious, there are certain intricacies that go along with each of them that aren’t so intuitive. Read each section below to see how each of these tips will help you stay safe when using a crash pad.
If you are interested in seeing what the current prices are for the most popular crash pads, you can find them on Amazon by clicking here. Using the Amazon affiliate link above and/or other links in the article helps support this website.
1. Make Sure The Pad Is The Right Side Up
This is one of the tips that may seem obvious but is very easy to mess up. Almost all crash pads are designed with one side to be on top and the other to be on the bottom. By putting the bottom side up, you risk injury as the pad will not be nearly as effective.
Crash pads are generally composed of two different types of foam. Closed cell foam and open cell foam. The closed cell foam is heavier and stronger than the open cell foam. It is responsible for breaking the impact of the fall and distributing the force of the landing. Open cell foam is lighter and softer than closed cell foam. It is responsible for providing the climber with a soft landing.
The closed cell foam is typically designed to be placed on top of the open cell foam. This provides a sturdy and soft landing platform for climbers. If this is reversed, the pad will not be as effective and could potentially lead to twisted and sprained ankles due to the flex/give of the soft foam.
In addition to different foam combinations, some pads have an outer rubber/grippy side. This grippy side is designed to be placed on the bottom of the pad. This will help the pad stay in place and not slip on the ground when landing.
Most pads will have the logo placed on the top side of the pad. You can open up the pad and feel which foam is firmer if no logo is present and the pad does not have a grippy surface. Be sure to place the pad with the firmer foam side up. Typically, pads will have less closed cell (firm) foam than open cell (soft) foam.
2. Position The Pad To Cover The Fall Zone
The fall zone is the area directly beneath the climbers hips. When the climber falls from the rock, this is where they will be landing.
Having the pads cover the fall zone will be the optimal pad placement. This will allow the most area for the climber to fall on. If the pad is positioned to be outside of the fall zone, this can lead to serious injuries. Climbers that fall on only part of the pad can end up with sprained and broken ankles. Tips #7 and #11 further discusses how to make sure the pads cover the fall zone.
Having pads outside of the fall zone can be beneficial as well. AFTER covering the fall zone, pads can be placed around the fall zone pad. These pads will serve as extra protection incase the climber takes a weird fall and ends up slightly outside of the fall zone. Rock climbing is a dangerous sport as it is so if you have extra pads you might as well put them to use.
3. Make A Level Landing Area
Sometimes the fall zone will not be on a level landing area. Some problems will have jagged rocks, tree roots, and other objects inside the fall zone. If this is the case, you will want to make sure to have a level landing area.
Uneven landing zones will not be very effective at catching falls. The uneven surfaces will be hard to land well on and can send climbers soaring off their pads. This can be more dangerous than it sounds if hazards are present near the route such as rocks and trees.
To prevent this from happening, you can fold or stack crash pads over these objects to create a level landing surface. If you have a limited number of crash pads available, try placing other objects to create a level surface and place a crash pad over that.
In the past my friends and I have used extra blankets, towels, clothes and backpacks to create a level surface for the crash pads. Just be sure that nothing breakable is placed under the crash pad. A friend of mine may or may not have had a laptop in their backpack and used it to level out a landing surface… that was not their brightest idea.
4. Lay Out Multiple Pads To Cover More Area
Traverses are bouldering problems that stretch over long lateral distances. For traverse problems you will want to have multiple pads laid out along the route. When laying out the pads, be sure that they are touching and no gaps are present. Gaps between the pads can lead to injuries when climbers fall into them.
Ideally you will be in a climbing group that has a lot of bouldering pads. By laying these along the fall zone of the route, you are protecting the climber every step of the way. Usually traverse routes are not very high up in the air and you will not need to stack any pads.
5. Stack Pads On Higher Problems
Highballs are bouldering problems that are higher than average. For higher falls you will want more padding underneath you. It is common to stack pads to accomplish this.
When stacking pads you will want to keep a few things in mind. You want to make sure that your pads are on a level landing surface. If the surface is not level, the pads will likely slip and not work very well. In addition to this, make sure there are no gaps between the pads. If there is a gap then it is possible that the climber’s foot could slide through it and cause an injury.
I have found that using multiple pads as a base layer and then laying a pad or two on top of that multi-pad base layer works the best. This provides a very secure landing surface for climbers. If you have a pad that has a grippy bottom be sure to use this as a pad that goes on top of the base layer of pads. The grippy surface sticks well to the other pads and will prevent slippage.
6. Make Sure The Most Dangerous Part Is Well Covered
Ideally the entire route will be protected with crash pads but sometimes this cannot be accomplished. Certain areas may be unprotected at times either due to a lack or pads or the length of the route. When deciding where to put a limited number of pads, always be sure to cover the most dangerous parts of the problem first.
The most dangerous part of the problem will depend on three main factors:
- The likelihood a climber will fall there. If climbers will never fall at a certain part of the route then a pad is not needed in that area. More likely spots to fall (i.e. the crux) should be more covered than easier areas.
- The distance between the ground and the potential fall. Higher falls will be exponentially more dangerous than shorter falls due to the acceleration of gravity. Stacking pads for high falls is definitely a good idea.
- The presence of ground hazards such as rocks and tree roots. Even shorter falls can be very dangerous if rocks and other hazards are present. It is very easy to break a bone when landing on a sharp rock from 6 feet up.
Making sure to cover these areas of the route should be a top priority when placing pads. When positioning the crash pads in these areas, be sure to have a level surface and remove any gaps from the pads as discussed above.
7. Move Pads When Needed
As discussed in the previous tip, sometimes you will not have enough pads to cover the entire route. In this case, you should have your climbing partner(s) move the pads when needed. You will always want to have your fall zone covered with a pad.
If you have a larger climbing group, some of them can function as pad movers while others can function as spotters. This is the best scenario to make sure everyone is staying safe.
When moving a pad, it will be easiest to have two people grab opposite sides of it, lift it up, and place it in the desired area. Always make sure that no gaps are present between pads when moving them and be sure to place the pad underneath the climber’s hips to capture the fall zone.
Dragging the pad may seem easy but should not be done. See the following tip on why dragging the pad is not ideal.
8. Do Not Drag The Pad When Possible
Dragging the pad is not a good idea for two reasons. The first reason is that it will wear out your pad. Pads are designed to be lifted and placed, not dragged. Dragging the pad over rough surfaces will wear out the casing material and will reduce the lifespan of your pad. Crash pads are not cheap by any means and you should want to get as much use out of them as possible.
The second reason is because dragging pads can kill underlying vegetation. A significant part of being a climber is respecting what nature has provided us with. As pads are not light, dragging them can rip up plants and other vegetation. It is best to avoid doing this whenever possible. Leaving no trace is one of the unwritten rules of the climbing community and should be taken seriously.
9. Remove Accessories When Necessary
Some pads will come with accessories such as a shoe mat or straps. Be sure to remove these from the landing surface of the pad and make sure they are out of the way. If a climber lands on one of the pad’s accessories, they could slip or get caught on it and land weird. We want to prevent weird landings whenever possible.
Most pads will have removable accessories or accessories that are designed to be on the bottom of the pad (shoulder and waist straps). If your pad has accessories on the top of the pad that cannot be removed I recommend taping them down with duct tape. This will prevent climbers from slipping or getting caught on them and will remove the hazard.
10. Fall Feet First Onto The Pad
This tip is geared towards climbers who are used to bouldering in a climbing gym with the entire floor padded. The padded floor in climbing gyms is very soft and forgiving. This allows climbers to fall with improper technique and get away with it relatively unscathed. While that may be the case in the gym, it is not the case when using pads outside.
When falling from the boulder, be sure to fall feet first if possible. When making contact with the pad, bend your knees to absorb the impact. If falling from higher routes, after bending your knees, sit back and “sit” onto your butt. This is the best way to minimize the impact taken when falling.
Falling improperly will increase your chance of injury as your body will not be able to absorb the shock of landing. If you are climbing on an overhanging route and are unable to fall feet first, do not stick out your hands/arms. Sticking out your hands and arms can cause you to land awkward or to hit objects/rocks not covered by the pad.
Pads are only effective when they are used properly. By falling on them in a dangerous way, you are opening yourself up to a higher chance of injury.
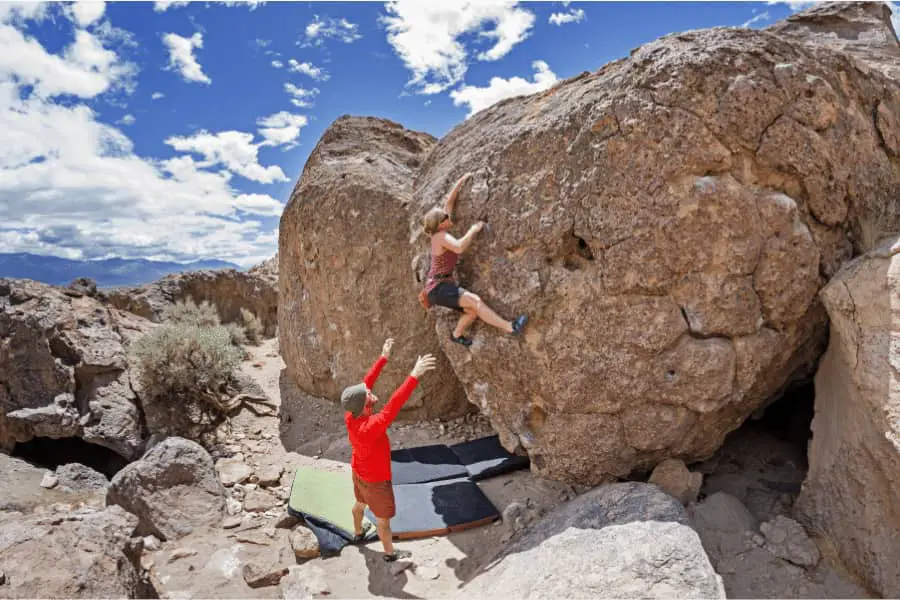
11. Have A Good Spotter
Having a good spotter can make a huge difference when climbing. Keep in mind that the spotter’s job is not to catch the climber. The spotter is there to make sure the climber falls onto the pads laid out underneath them.

The spotter will act as a brace and help guide the climber onto the pad(s). To do this, the spotter will stand at the ready watching the climber on the route. As bouldering routes typically have difficult moves at every place along the problem, the spotter should always be ready for the climber to fall. They should have both arms out stretched with their hands open and at the ready.
Once the climber starts to come off the rock, the spotter can place their hands on the climber’s shoulder blades (if needed) and gently guide them onto the pad. Spotters should not push the climber with so much force that the climber becomes off balance. They are merely there to make sure the climber does not fall back and land off the pad.
In addition to guiding the climber, spotters can make sure to re-position and move the pads to fully capture the fall zone. Ideally the entire route will be covered by pads but if a pad needs to be shifted, the spotter can do this as well. Be sure to keep tip #8 in mind when moving the pads.
The bottom line? By following all 11 tips you will have an awesome and well protected outside bouldering experience. Crash pads are excellent at creating soft landings for climbers when used properly. Get out and get climbing!